Read the transcript of the lecture
We're gonna use a spray prep or nail prep who swears what worked for him.
We blow it in thoroughly, we do not save money, it is very important, feel free to soak here in this liquid to drain the water well, remove the fat from the top of the nail.
Obviously also disinfectant, this is very important, especially such a Russian renewed Russian manicure education, that the surface of the polished skin, if you have had any micro-damage that you shouldn't have, should be disinfected.
Okay, we wait for the whole dryness and fan can help the speed of this process, but it's always faster, you don't have to wait it out one by one, because we're working on ten nails, so it's going to be faster.
And, well, then, everyone decides what kind of grip they're using, what kind of fluid they're using.
It worked for my nails if I used an acid primary, so I usually put this on, but it's only in the grown-up area, so where the former material is found, I don't get used to it now, it's not just a huge problem, but it's an acidic material, I don't want to eat the former raw material, so I prefer to use Savas Primer at this time, but for whom the acid-free primer can safely be applied, I also recommend a growth area, because the previous material that has been covered with mattes doesn't need to add any extra adhesion fluid to it, because it will still stick with the next extractable material.
This is very important, isn't it, if you look at the fact that I left a thin layer of the previous material, it's on the color.
This is very important, because if you always cut the previous material completely to zero, the entire nail plate will be clipped too many times, and unfortunately it will thinn out.
So always leave a very thin layer of the previous material so that the natural nail plate cannot become thin, but leave it in such a way that there is no big bump in the back, so that it does not interfere with the application of the material, and that the material will not flow around the nails later, or that the surface is obviously not ugly.
It's good that if we're done with this, then if you guys want to test acid-free primer, I'm not gonna do that, and we're gonna pick out a booster gel polish hat.
I'm going to use a white color, a milky white color, which is because you're going to see where the raw material is going, so I didn't want to use a transparent one right now, so you can see better, and you can choose any color you want, and then you're going to put it on my fingernails, but I'm not going to use it because I wanted to use it on my ring finger, but then I'm not going to use it, but I'm going to use such a good neon-blue color.
This is the color 130 for Nice.
Anyway, I'm not happy with it, because it's not that well pigmented, but I'm already up on my right hand, so I'm gonna put this on my left hand.
Now, what I think might be worth mentioning with a drawing is what we should get as a result.
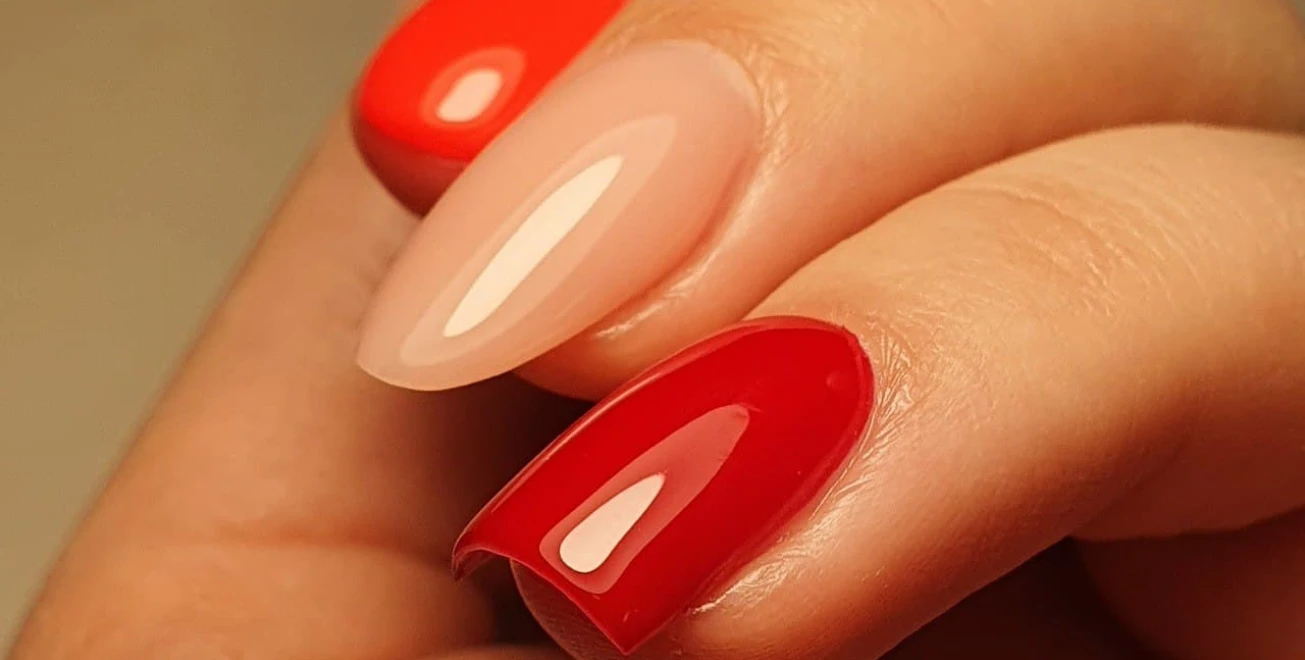
In the reinforced gel panes, it is very important to have a nice C-bar, so here is the natural nail plate, and on the surface of the natural nail plate we create such a stretching C-edge beautiful surface.
In such a way that the raw material is not completely thinned here at the beginning of the free wind, so it should be thick, but we should get a very nice surface.
So we also need to check from the side view that the material is thinning at the base, because it will be beautiful without growing down, and then there will be no big bumping difference in the level between the grown-up material and the natural nail plate, and there is also raw material at the beginning, so that the nails do not bend back and forth, and obviously the most important thing here is the C- arch to have a static for the nail.
So it is very important that we strive to create this interface.
And it has to be beautiful from the top to see how we can achieve that.
I'll draw you with the light, the light running on it, or with the control of it.
The dust remover below makes it a little harder for me to draw here.
So, if we have a lamp with such a circular lamp, it's got such a smooth bulb, isn't it, a round bulb like this, it's possible to achieve such egg lights, then we'll see such a prolonged form of egg.
That's super good.
The closer we get, the bigger the egg shape, the farther we go, the smaller the egg shape.
If we see that our egg form is such a broken fried egg, then we can conclude that the surface is not even.
Which means that here, in this area where it narrows, it's down there, so there's a valley like this.
And this is a higher part of the nail.
So here's one of those bumps.
We have to try to straighten this stuff out so that a regular egg form like this comes out of it.
Then there are those lights, like the Giga LED, Mega LED lamps, which are this long from the side view, and then it's this small telescope, it's gonna give you this long strip of light, so it's just gonna run this thin strip right here on top of the nail.
It's a regular form again, it's good to see one of these again, but if it breaks a little bit like this, then again we can only conclude that the material is higher, there is less material, so we have a bumpy surface again.
Then there's a lamp that's a circle in itself, but there's nothing in it.
That's what this looks like, but it won't give you such a full-blown egglight, it'll give you such a slightly longer round shape, and it'll have a hole in the middle.
If this doesn't work, if we don't have a good surface, then obviously it's gonna be one of those deformed fried egg-like things on the surface.
Okay, so the more regular these basic forms are, the nicer we worked, the better our surface will be.
We can do that by calling for gravity, so we'll be able to turn the nails around to get in the middle a little bit.
Now, it's a special situation for me, isn't it, because I'm basically in my arms and my nails, and it's very C- arch, which is why it doesn't look so good if I put one more C- arch material on it, so I'm gonna work a little bit further, so let me have that much cheating, because otherwise it doesn't look nice.
So you always have to adapt to the customer's needs, to his own unique talents.
We're gonna need a thin brush to guide the matter.
Now they usually use a zero case, which is not bad, but if we have to move very large amounts of mothers, then I often find it disturbing that the brush is too thin and leaning away, and instead of, say, moving the material there, I need three moves, and at the end, I spend so much time with the administration that it starts leaking, and it flows into the grooves, especially if I use such a softer type of strengthening gel base.
So I'd like to suggest to you that you're looking at the perfect zero case of the medium, which, for example, is not good for thin lines, because it's too thick for that, but in some cases, it's really good to use it, for example, when you have to put this strengthening foundation in its place.
Well, I'll show you what we have to do.
First, we'll put on this slippery layer.
I'm gonna take some of the raw materials and I'm gonna turn them towards me, and they're gonna simply use these lacquering moves to raise a base layer.
We're getting as close as we can.
We're working with this, as far as possible, under the back of the skin fold, but you don't have to cover it so much, because then it just goes all the way down here, but it's as close as possible.
We're gonna smear this slippery layer, we're gonna take out a large amount like this, and look here, I'm gonna work it off the brush, I'm gonna push it in the back, and I'm gonna pull it down to the front of the nail, and I'm gonna pull the material both to the right and to the left next to the spine, and I'm gonna wait for the stuff to spread a little bit.
Okay, here's a little bit more empty.
I'm trying to translate it so you can see we're gonna pull some more stuff in there, but not much more.
We're gonna take our little psychic brush, and we're gonna work it out a little bit here on the side, and it's gonna slide in nicely, and don't pay attention to the fact that the surface might be this messy as it pulls the brush's hair, it's gonna push the material a little bit, but it's gonna pull it in there, and if it's necessary, we can turn it around, but, you know, I'm not gonna turn it in, because it's gonna be very C-edged, and I'm gonna look at the light on its surface.
Well, I've got a lot of lights above me right now, so I can't show you exactly what shape to give back, because I've got all the kind of lamps that exist above me right now, but I can see that there's a little bit more stuff in the beginning, so I can just drive the stuff back forward, so let's put it in the lamp.
So above me is this leaky circle, there's a giga, there can be a long lamp, and there's two light lights, so it's a little hard to give back the light running on it, but this way you can see at least a lot of things because there's the right light.
We put it in the lamp, so make sure that it's a larger amount of material, so that it can burn, that if we use such materials, not all of them burn, but they can typically warm in larger quantities.
You have to tell the guest not to wait for heat after a few seconds, feel free to take it out of the light, wait a little while, and then put it back on, and then it won't get warm.
In a salon, we're gonna make all ten nails, so we're gonna put a slippery layer on a nail, we're gonna get the C curved cover, we're gonna go in the lamp, he's gonna give you the other hand, you're gonna make the slippery layer, you're gonna go into the lamp, you're gonna do this on ten nails, and until you get to the thumbs, the pinkie, and if you start with that, you're gonna have so much bonding time that you can start putting the color on it.
I usually recommend the application of these strengthening bases one by one, obviously depends on density, and also on the length of the nail, how much material you need to put on the nail or on the nail, but I don't recommend more than two nails, because the material can already spread so much that you no longer influence the appearance and surface of the material, but it begins to live such an independent life, and once it is in the fold, it is very difficult to remove it, unfortunately, and then it is usually shown in the end.
It's good that if we've waited for the full time, then let's get back to work.
This is important, because if the full time is not waited, the surface will often be too sticky, in Hungarian it will be very slippery and hard to work the colors on.
If it is usually a problem for you, that you may be working slowly on the colour upstairs and running all over the skin, then after binding you can fix the surface of this raw material or any gel intensifier material, and you can buff the surface a little bit to make sure that the surface is matt so that it doesn't have a adhesion problem, or if someone doesn't have a nice working of the raw material, you can recreate the shape of the nail in the outdoor area if necessary.
I don't normally do it, so I don't recommend it, but if you have to, you have to do it, because then it's gonna be really bad.
I'm not gonna do that right now, and I think it's all right for me, so I'm gonna start putting on the color.
First of all, I'm gonna make a paper towel here, because we're gonna use a zero brush to clarify the staining, so I'm gonna take a little blue out here, because you're probably gonna need it, and now I'm not gonna use the psychic brush, I'm gonna use the zero line.
Brush.
This is Moya's Nail Art Brush Series 00 synthetic brush, and I'm gonna do it here, and I'm gonna do it here, and I'm gonna do it again, and I'm gonna push it back, and I'm gonna do it a little bit.
In all the time I've been talking, it's possible that the skin will relax, so the heat will let you back in a little bit, even though you've worked nicely, and that shouldn't be a problem for us to be able to work nicely, so it's worth a little adjustment.
Well, of course, our color was shaken before use, and I stirred it earlier, because I had done my right hand before, so we can work directly.
With a very, very good heart, I recommend to you these round-end brushes can work very well, and in many cases in a salon you can avoid using the 0 brush.
It's so nice to work with.
I take little material, I always start from here, from the middle of the nails, I don't put the material down to the back of the skin fold, because then there's still a lot of material on the brush, and unfortunately, by the time I'm done, it'll be all over the place.
The closer I push the material with his own brush, the better I smear the whole thing, first in such subtle steps, the closer I come to the side lines, and then I smear the front of the free goal, right, the edge of the nail, and then we pull it over.
Unfortunately, if you're looking at it, it's a color that's a pretty bad cover, so I'm gonna pick up a little bit more and pull it across my fingernails, and I'm gonna take my zero brush, and I'm gonna pull the skin back with my two fingers, and I'm not gonna be able to do it on my own, so I'm just gonna do it with a zero brush, and I'm gonna work the color between the skin and my fingernails as much as I can, and if we're done, I'm just gonna go in the lamp.
I don't have a lot of time anyway, because for the pleasure of not having enough pigmented color, it's even very runny, so given this, I have to work a little faster, but it's certain that even within a brand you have less pigmented color, more pigmented color, more thinner and denser raw material, sticky, less sticky, so after a while you know your colors and then you know how quickly you have to work.
After lightning binding, we can remove it and apply the second layer, in the same shape as the first.
If we were good at it, we might not have to adjust the raw material to the skin by the second layer, but if we want to gel very, very, very professionally, it's also worth smearing the surface, smoothing the surface, and working the color under the skin.
It's too bad I can't pull my own skin back.
I need another hand.
You see, you can work very well.
So none of the guests are saying that we've made him grow to come back sooner.
Okay, let's put it in the lamp, tie it up, and then light changes to the surface.
I will use a fixed, flexible, universal gloss gel, this Cool TOP Original, but, of course, another gloss room has come, and you can obviously cover the nails with math if you want.
It is also worth waiting for a full bandage here, especially if you are working with such an overpigmented color, so as not to discolour the brush of the gel of light.
If it does happen, it should be wiped with paper towel and put back in the jar in such a way that it may discoloured the remaining gloss gel for us.
In the meantime, it is worth counting on the fact that if our surface wasn't perfect, so we can already see that the base didn't work out so well that we could get a zero brush out here and wash it out, so I used it in blue earlier, wash it out in gloss, roll it over, remove the blue pigments in it, and use the gloss gel to adjust the surface in the same way as when I directed it with our white primer gel spray with the medium brush.
So the same light gel can be fixed even on the surface, because with the light-surgery surface we will see that final light, that egg shape or strip, you know, when it reflects the light of the lamp, whether it has become beautiful.
If it's not nice, adjust the gloss gel with a brush of 0.
You don't need a psychic brush anymore, because it's too much to add a gloss gel much softer, a softer brush is enough.
Okay, and then we're gonna do the glow gel.
I'm used to suggesting that we do not do too little because it results in a bumpy surface.
Let's put it a little braver, try to find a glossy gel with medium consistency, not too runny, but not too dense, and then the material won't flow in, but you can put a little more on the surface with it smoothing down nicely, and then you can give us very nice egglight.
We're gonna put it on the front of the nails.
Okay, and when we're done, let's put it in the light.
And we're almost done, actually.
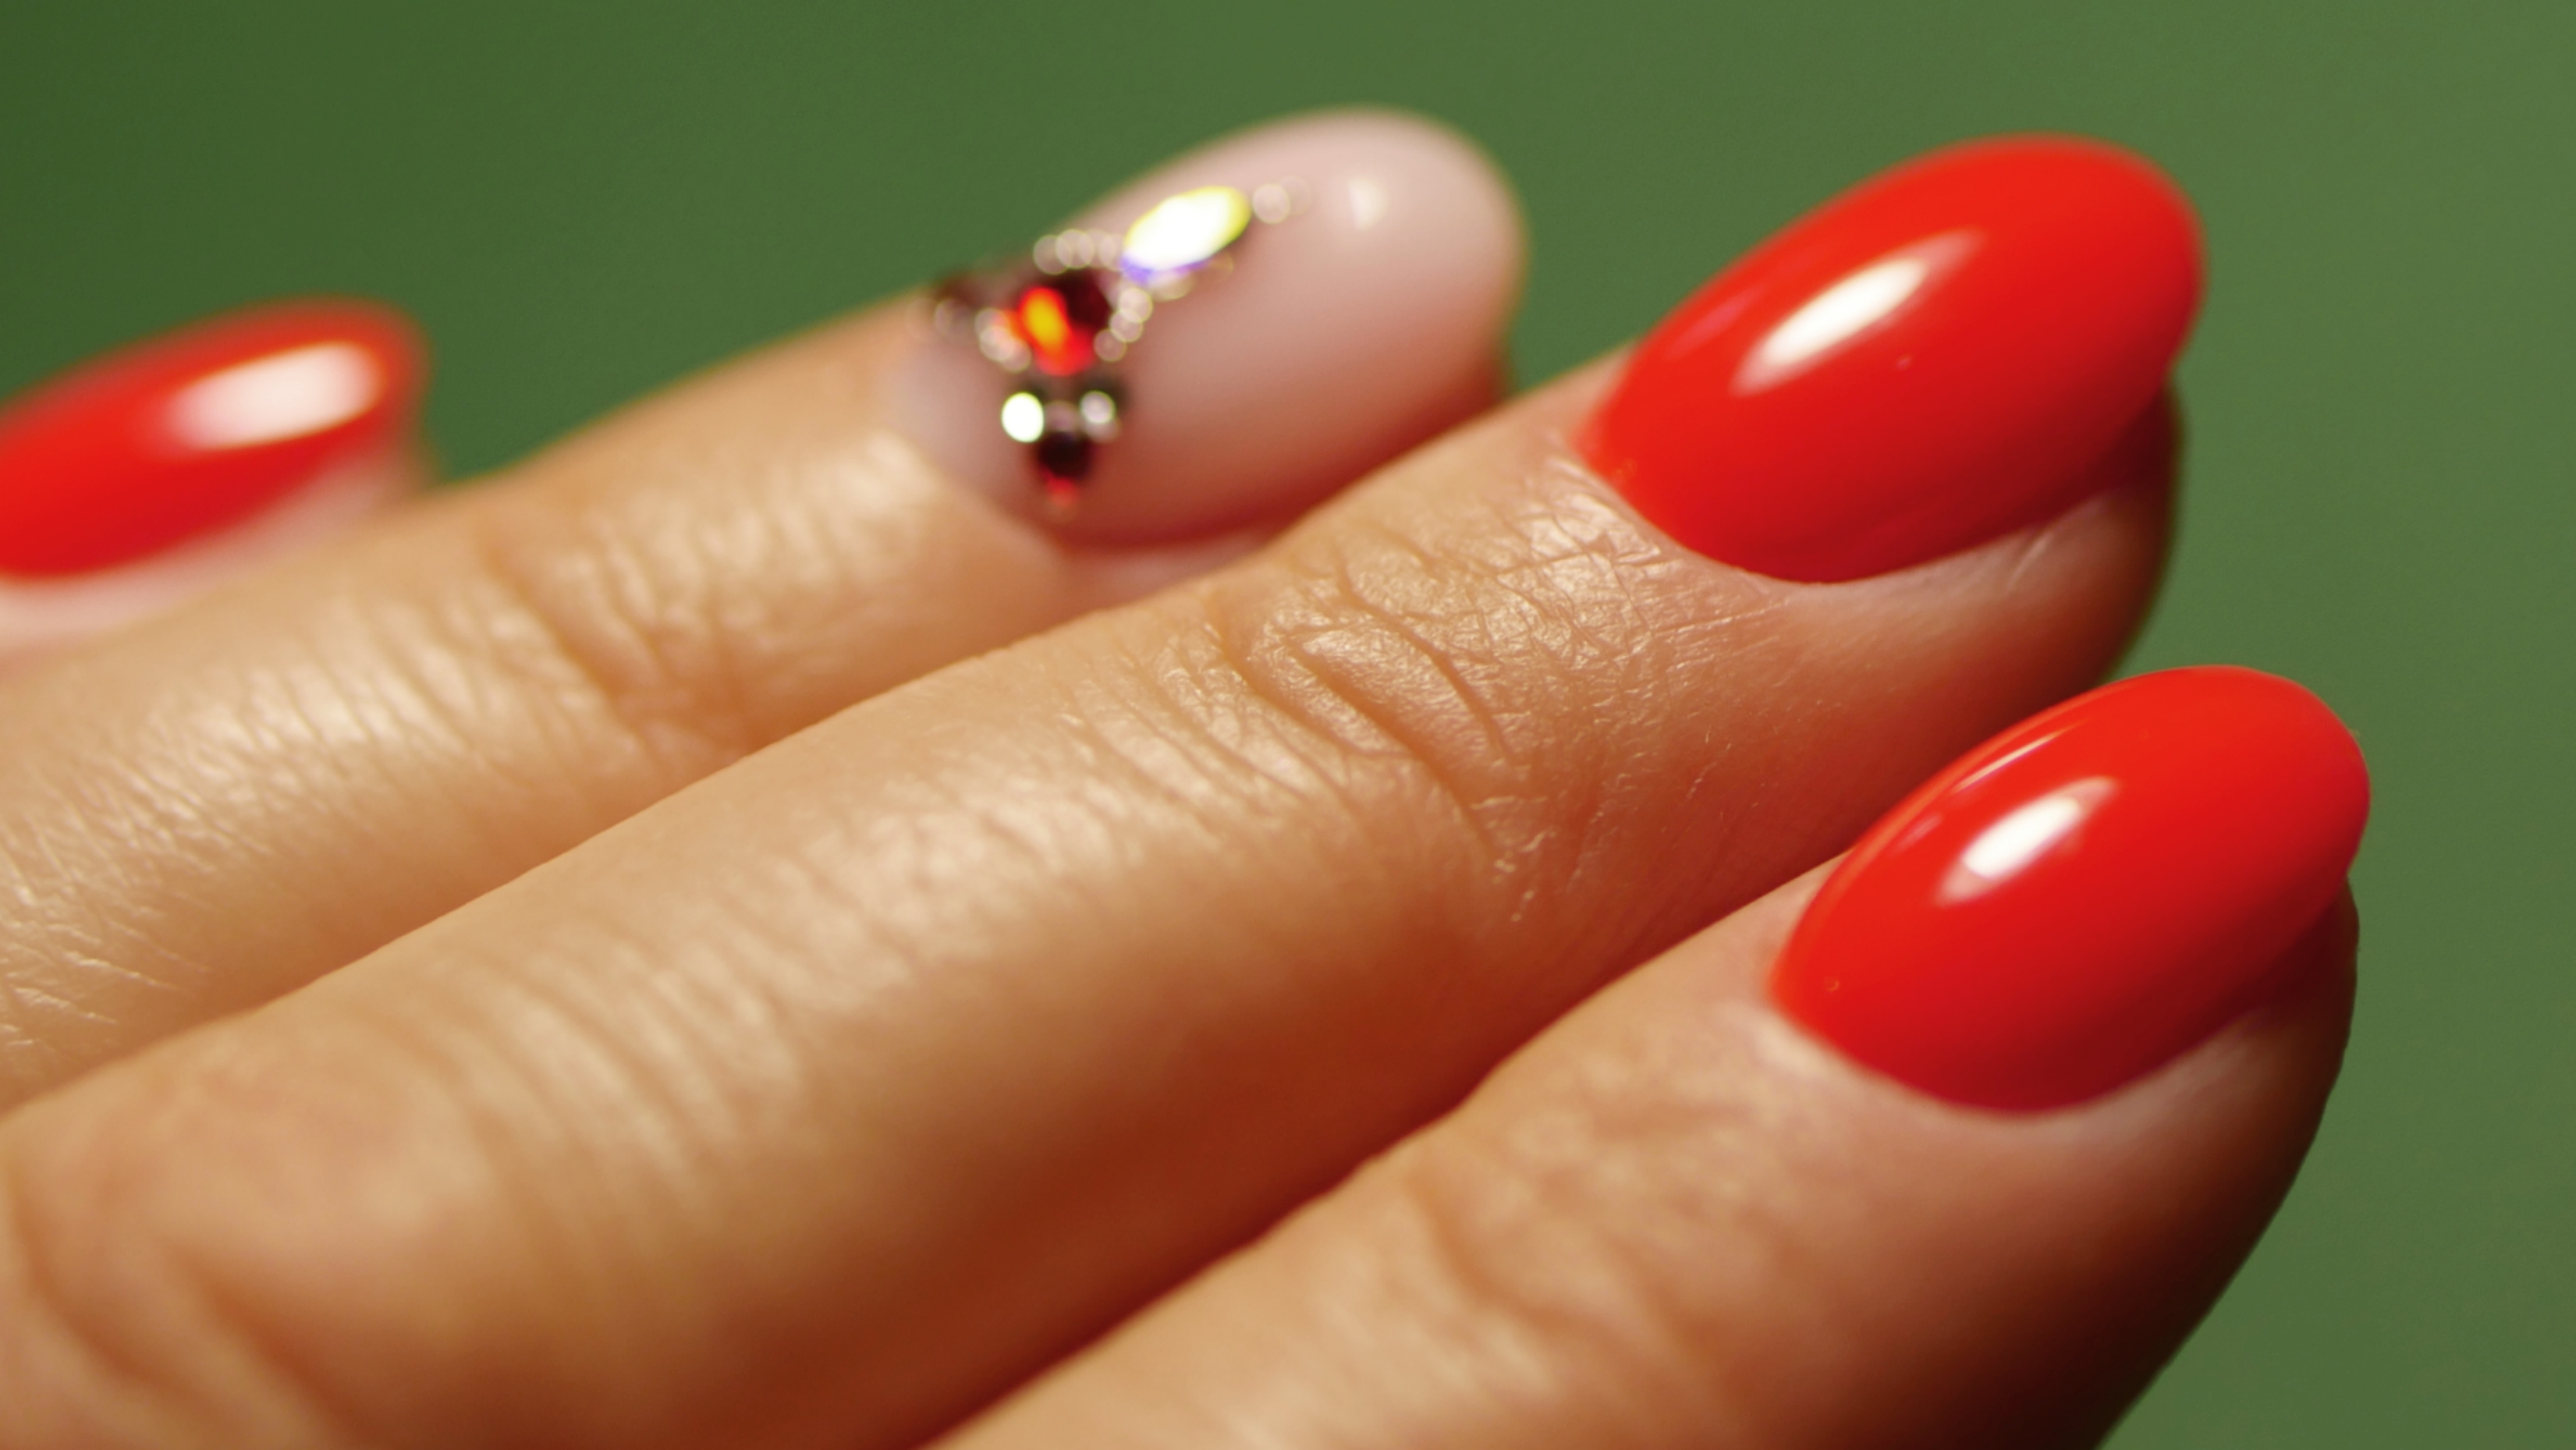
A Russian manicure is also part of my belief that we'll learn how to numb the guest's finger and take a nice picture of it.
First of all, it's very important that you shouldn't blurt about oil.
So don't smear an oil around like this, because it's very difficult to remove it, so send the guest to wash his hands without soap again, just rinse his skin with water, the end result will be much nicer, and I'd like to suggest an oil-like material to you, but not as thick oil as a smooth skin care oil, but this Brieber's super-fine climater, it's on skin, so you don't have to wipe the nails with it, you have to wipe the skin with it, and I'm always used to come up to the head, because if we're obviously not just going to take pictures of the nails in general, or you can see it, my finger is horribly dehydrated from nail prep.
And if they do, it's not gonna be such a thick, very bright, shiny effect, but it's still a groomed effect, but you don't have to lubricate it with a cream, which is also not such a good choice, but I think the best way to do it is to send a guest, rinse his nails, and then you can put this cleaner on, so that you can polish the skin a little bit, or you can use a reverse order, and then you can just get up and wash your hands.
The point is, you're gonna have to wait a little bit after the bandage, because the surface of your nails can get a little bit back in shape, so you're gonna have to pay attention to that.
Now, what I'm gonna do is I'm gonna wipe my skin with the wet, numberless wipe, spray it with water.
I'm gonna wipe it a little bit like this, and you see, it's gonna make a lot of difference.
Okay, I'm gonna come down here and down here, so these little details, they're all very important, they're all forgotten, and I can see that the pictures aren't pretty.
That the job would be pretty good, but the picture somehow suggests such a lack of need.
Well, unfortunately, that's why they're here, because they don't pay attention to these little details.
You don't have to take every fingernail, you'd better put on less pictures, but that should be nice.
It is very important to have less more, you know, there is this saying that it is enough just to put on the most beautiful ones, the nice nail beds, the beautiful-fingered guests.
I know, I know, it's not very nice.
But the guest doesn't want to see what his ugly thick finger becomes, but wants to see it create a fantasy, but it's nice that it could be something like that for him.
So that it's such an illusion, but it's going to motivate her most, I think, to go to a nail guy, that he wants to be so beautiful and so beautiful.
Good.
I'm gonna blow up the cleaner on a fiber-free wipe, and we're gonna wipe my skin, and this little one, if you look at it, you see, has a little light, we're gonna come down here to the side sticks, I'm gonna wipe in there, and look, all these white little particles have to disappear.
That way, you can go through here, and you can go through here.
And there's only one little thing like that.
This one with scissors over there.
Look, I'm gonna take it down real quick.
Okay, then I'll show you at the very end what it's like to be flushed with water.
Okay, in the meantime, I rinsed it with water, and I'm gonna show you another trick, and it's that if we push this skin back just a little bit longer, then it's really gonna be so brutal non-gender, it's gonna be non-gender, so you can see very nicely that there's no gap between the color and the skin.
Okay, and if you'd like to take photos of Russian photos, at least in a style, then on the one hand you're gonna need a good smartphone, or you can obviously use a camera, but usually everyone uses a smartphone, and you can clip a macro lens on the lens, the back lens, so I'd like to suggest you guys buy a macro lens, and then you can take an extra close-up photo, I can tell you, I have a macro lens like that.
It's one of those tweezers.
This one can be clipped up here.
Who's got their lenses, right? My previous phone, for example, could be pinched from above, and such super images can be taken, such nice close-ups without being vague.
I can make something this close, and it's still gonna sharpen the image.
And that's how you take these really cool Russian photos.
See, that's how good it can be used sharp.
Good, and by blurring the edges, you might as well.
So I'm definitely offering you a lens like this.
Now that I've taken it off, I'm bringing it this close, it's all clear, it's all blurry.
I just can't get that close, you see, it's clear, it's blurry.
That's how I could do it.
It might be possible to zoom in, but after a while, it'll be blurry.
All right, well, that's all I wanted to show you guys.
I hope you liked the curriculum, it was useful for you to look for us with confidence if you have any questions left.
On Facebook, you'll find two groups called Edubel students, a pay-per-view student and a free course group to join in what you guys are doing, and if you want to do this nail, send us the final result, and then we'll put the best ones on our Facebook page.
Thank you very much for your attention.
I want to wish you guys a good education.
Hey, guys.
Show More