Read the transcript of the lecture
In the meantime, I also disinfected my skin lift scraper, because that didn't happen at the beginning, and that's what we're gonna use to push up the back of the skin fold.
I'm gonna keep it at a 45-degree angle, it's very important, if we really lift it up, we're gonna press down the nail bed part, and this could cause permanent deformity on the natural nail plate, it's gonna have its fingernails wavy, it's gonna have a wave, it's always gonna have a wave like this, always indicating that it's been pressed here once, and unfortunately, it's noted this softer nail part, this effect, and unfortunately, it's gonna grow into eternal life, at least it's got this opportunity.
If we make sure that we don't overwhelm it, we don't overwhelm it, because then it'll jump, and it'll just run backwards, and we'll tear up the guest's finger here, so we'll keep it at about 45 degrees.
This, of course, depends on what your own nails are, so if you flatten your own nails, then you can keep it a little flatter for us too.
Well, maybe you won't be able to meet a more civious or squishy nail, at best, so you can lift it up a little bit to make it more comfortable.
Okay, I'm definitely pushing it back, I'm not pushing it, I'm not pushing it around, so it's not about scratching it, so I'm not pushing it back and forth, and I'm barely touching the skin, but I'm definitely pushing it under it, and I'm coming all the way down here, so it's about half the side lines.
Good.
And then I can say this from a close-up point of view that it's starting to develop there, right? We're starting to have a gap like this.
So this is where you can see it? It's possible to fit under the skin with some kind of freezer.
That's what we need to see, and that's what we need to get for a good skin lift after scraping.
The question that may arise may be what types of skin can be worked for when we want to apply a Russian manicure.
For the most part, we can work on almost everything, only guests with such very sweaty hands who do not come up so much, they typically even have very thin skin with their sweaty hands.
Their hands work as if, as I said, they're covered with cream, so you can't just do the dry manicure on them, so unfortunately, they won't consider this possibility, but I have a skin so thin, which may not be visible right now, but I can't even get these huge amounts of skin off for that.
I can already use this technique, and obviously, for someone who is stronger than this, and then especially there, it's very, very easy to work there, and you can cut out such huge chunks of skin, so in fact, most of the time, you can do this technique on everyone.
It's good that when we're done with the skin lift, we start using the freezer.
That's the first fries we use, isn't it? This, I understand, is one of the great favourites of the Tímár Flowers, this Half Flame 023 frezer, which we will remove with this.
You can see that there are a lot of skin on the surface of this grown-up part, and this is also, since it is diamond dusty, it will matt this area, so it is not necessary for us, for example, to overwhelm or maybe file it, I say this grating, because this technique works with artificial nails or artificial nails, so it is not only in the case of gels, and then we would be screwed over with a 180 file for this extension part, and this file can be replaced by this file, which is very, very, very good, I love it, because for these side nails, especially if it is such a narrower version of meat, you know, this side leather comes up very hard, so it is very strong for the guest, so it is almost impossible to fit in there with a file, and I have shown you alternatives, especially with such a narrower version of meat, you know, and then it is very powerful for example, you can be able to fit from the middle of these parts of the room, and then you can be able to remove from the middle parts.
So you can do a very nice, lasting job for the guest.
By the way, I usually have to say that it's not so complicated to work, I'm taking the camera a little further, so the manual unit is better in there.
First, I'm gonna work in the same direction as clockwise, otherwise no matter which direction we start with, we're gonna have to work both ways.
I'm gonna take it a little higher, 15,000 turns, I usually worked on smaller grades a long time ago, but with these fresers, I think it's better if we use them a little higher, we start from the middle, and we have to have a husband to push it in here, look under the skin at the tip of the fresher.
I'm gonna keep a close eye on the freezer compared to my nails, and I'm just gonna tilt it a little bit sideways.
I'll draw it, don't be alarmed.
So I'm gonna hang it up at a 45-degree angle and walk down here to the side lines with tiny steps, but not to the skin, but to the nails.
In the meantime, I'm gonna turn on my dust sucker because it's behind.
And I'll show you that you've already started to highlight it there, but you can see that there's still a lot of dry skin in there, and you've already started to clean the surface quite well.
All the way down through the grown-up part, I'm gonna come down a little bit, and I'm gonna slide the fresert through it, because we're gonna have to matt this area.
We can go through it several times, until I see the area under the skin starts to clear up nicely.
Middle to left.
I'll show you.
Okay, so we're gonna take this turn and we're gonna go the other way, so now I'm gonna work the other way around the clock, and I'm gonna start from the middle, and I'm gonna take it from the front, but I'm gonna make a little decision in the direction where I'm gonna pull my fresher.
I go under the skin, I hold it at a 45-degree angle with the tip of my sanding head, and I walk down the same path with tiny steps, and I let it take out the little pieces, where it's necessary, and there I see that there are still pieces of this, and I go back several times.
Okay, and then I'm gonna show you guys, with a little decorative needle like this, what a nice hole it is.
See? You can work the skin under this, but it won't be so spectacular yet, because you have to take it off, so this dry skin can't stay here because it's gonna get ugly, but if you look at it, there's still a problem in the problem areas, usually here, in these side turns, there's a problem here, and we still have to clean it up.
We're going to do this by working the clockwise from the middle to the left of the fingernail, on the other side counterclockwise.
We're going to turn the rotation around a little bit, so it's gonna pop the skints in another direction, but now we're gonna go through with it.
Now, just so you understand, I'll show you in practice, and then it'll be clear.
So now I'm gonna go left with my sanding head, because that's how we stopped working, and I'm gonna start from the left, and I'm gonna come this way.
I'm gonna keep an eye on him now.
I didn't tilt in one direction, I didn't hold it from the front, and I let it roll out the rest of the skints, and then I take it off, I turn it into the other direction of rotation, I take it up again to fifteen thousand, and on the other side, look, I come from here, I hold it from the front, and I go through, I hold it from the front, and where I see a problem, I go in there.
And I was actually able to do such a thorough cleaning that we would be able to get a very nice result.
Now, for that to be clear, I'm gonna draw this for you.
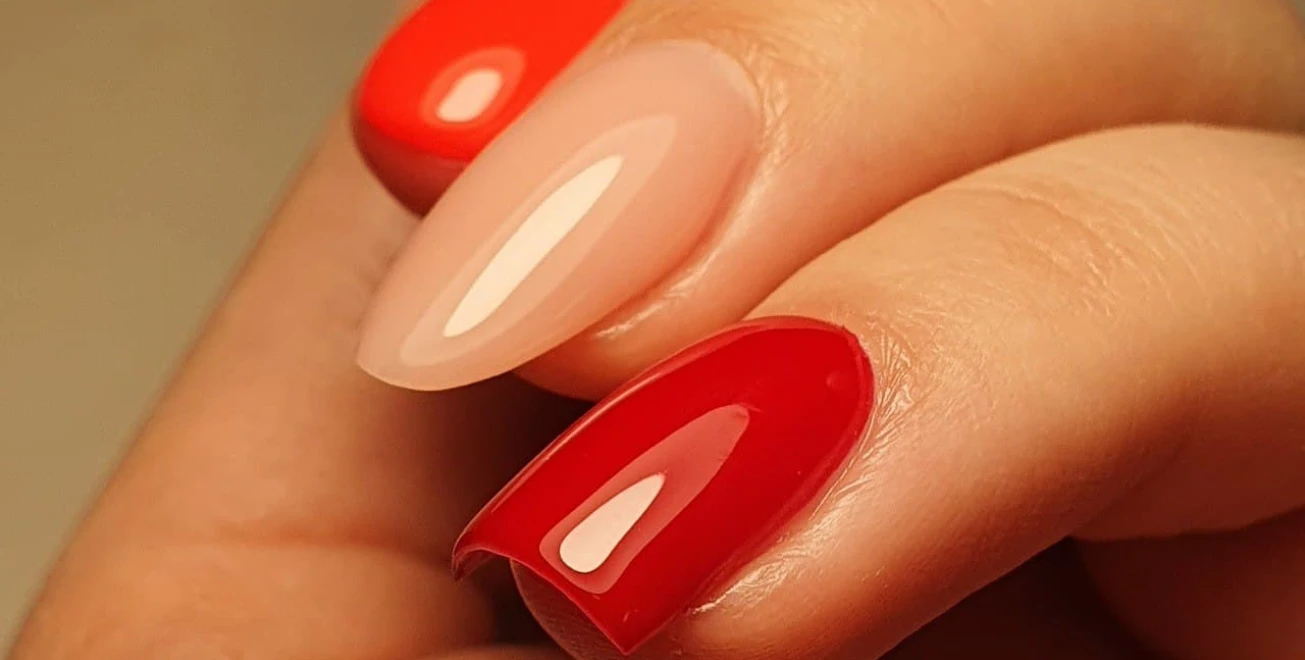
So this is a Russian manicure, a new one.
Right, our first step is a skin lift with a stair scraper and a pusher at 40-50, so it's a 45-degree angle.
So this angle is 45 degrees.
Okay? The second step is a Half Flame frezer, and we can separate two steps from that, above all.
First of all, we're gonna start from the middle, and our Half Flame frezer, let's say, doesn't matter which direction we go, so I can see that we're gonna go right, and we're gonna start left.
This one turns right, so it's clockwise, and on the way out a little bit, so I told you guys I'd hold it from the front, and I tilted a little outside.
That's how we're gonna hold the screen, and that's how we're gonna take this sander head down from the middle to the end of the side strips and to the corners.
This, if you look at it from the front, will also give you an angle of 45 degrees.
So we also have to work at a 45-degree angle here.
Okay, then we're gonna repeat this process in the other direction, right in the middle, and I'm gonna mark it, and that's how this halflame sander head is gonna stand, and we're gonna work from the middle down here along the sticks, and we're gonna bring it down here to this corner, so as long as it's in contact with the skin, we're gonna bring it down.
This will turn in the opposite direction, and it will also mean an angle of 45 degrees.
At this point, the speed is 15,000.
And that was our first step, wasn't it? Our second step is this ex-cleaning, and this means that with this Half Flame frezer, not from the side chutes, but here, where this arc starts to form, we're going to go through this section from here to here, and then from here to here.
We will also apply a 15,000 turn, and we can create a very nice cleaned surface.
So much for the drawing.
So here's where we are, and then we're gonna clean up the side strips.
To be able to clean this up so nicely.
You see, there's so much white dry skin in here, you should sort of remove it, with this little frezer, we're gonna mostly remove it, or we're gonna make a well like this, a tunnel like this.
Here, and so we can work very nicely later at the gel filling so that we don't touch the side skin.
Okay, well, we're gonna take this Half Flame frezer down, and we're gonna put this Needle fresher in there.
We work in the same way as clockwork, and we can go up to 15,000 turns and turns, but we can work on a smaller gear than this frezer, so it's about 8-10 thousand, 15,000 turns that come to mind.
We're gonna start with the left side again, and I'm gonna put it in here, and I'm just gonna drag it through the skin like this, not against the nail, but through the skin from the back to the front.
You see, the dry skin starts working for us on the way out, and we can help it out a little bit, so we can sweep this skin out of here, and we can polish it off nicely.
For example, if someone uses a combined manicure, this side dry skin can be cut off safely with a pair of scissors.
We're gonna switch it to another direction, I'm gonna take it up to 15,000, and I'm gonna turn it in a little bit, 'cause I don't have that much room for me, and I'm gonna do the other side the same way, and I'm gonna come from back to back, and I'm gonna sweep it out.
I'm gonna use it to remove the brat.
There you go.
Okay, that's the job of this frezer, so I'm gonna draw this one, so step three, nidli, grinding head, and this one, as this arch starts, we're gonna use it from about this point to the first corner points, and we're gonna slide our fresher from behind to the back.
On the other side, we're working clockwise here, and on the other hand, we're working clockwise.
This way we achieve that it will go outward, so it will work the dry skin outwards for us, as you have seen, and here we will use the freezer in the other direction, and this dry skin is going out, and here it is important, I will show you from the side view that we will use our sanding head parallel to the nail, so we have such a good long-bottom freezer, and we will apply it in parallel with the side line and the fingerbone itself.
It's not raised, we're not digging with the tip, we're working with the entire surface.
Then our next freezer will be this.
Well, that doesn't have any extra names, it's called a cylinder, by the way, the 25 Frézer, so it's 025.
And with this we'll loosen the skin, it's a very exciting part of the thing, and from here we'll start lifting up the skin boob like this, and we'll be able to cut it off later, either by cutting it off or by removing it with a sphere freezer.
We're working in the same direction as the clock, and now it's enough to take it for about a ten grand turn, so we don't have to work on that extra high speed right now.
We're gonna work with a side position, not a full side hold, but a little tilted towards me, so I push my fresher up, and I'm very tilted compared to the surface, I'm almost trying to show it, so I'm holding my sanding head down.
So I'm not gonna lift it, not parallel, but I'm gonna use the skin a little tilted down, and I'm gonna push the skin up, so I'm gonna touch the head of this cylinder frezer to the skin, and look at it with tiny steps, so I'm gonna start sweeping up the skin.
When I get to this curved part, I'm gonna start holding my sander head from the right.
I'm sweeping it, sweeping it up, repeating that.
Pull this skin out even more, and when I get to the center, I'm gonna go a little bit further up with my sanding head and my manual unit, so I'm gonna keep it down, I'm gonna come to the side, I'm gonna come up from the top, and all the way, look, I'm gonna tilt my manual unit in the other direction.
This way you can do it all the way, so I keep it from the right side, but if it's uncomfortable, you can change the direction of rotation, and maybe you can work from this side, because it's more comfortable to work as a right-handed person.
In order for this skin to be lifted more effectively, it can still be passed.
It's not much on this side anymore, because we've passed several times, but we can still work on it from the middle a little bit.
It's okay if we touch it, you see, you can even take sides here.
It's okay if we touch the natural nail plate, don't worry about it.
It's one of those delicious little frazeres, so it's one of those tiny little diamond dust ones, but it's the best, so it won't cause any damage to the natural nail plate.
Well, we're not going any further, we're going to draw.
This is gonna be our fourth step, and the name of this is, I'm gonna put the code on it, it's a.25 cylinder.
And I'm actually gonna draw it a little lower, so we're gonna tilt our freezer down first.
I will mark this small center of the side, which means that the area between the rear arc and the corner can work until now in this position, and even a little higher, and when I get to this curved part, I will start raising this manual unit a little higher, and when I get to this point, the center of the back skin fold, I will definitely have to hold this freezer completely horizontally.
When I cross over the center, I'm gonna have to raise it again, and I'm gonna turn this frazer all the way to the left, so I'm gonna come through.
Okay, so you're gonna have to keep pointing it out like this, you're gonna have to make a curve like this with my frazer.
The past will be very easy, so you don't have to be too afraid of what angle you're going to hold it at right now, you're going to feel it, you're going to see how the guest's own unique nails or skin can work, but that's pretty much the point of constantly turning in this manual unit, this frezer.
In this case, our turn was about ten thousand turns.
And then all we have to do is remove this highlighted skin brother with the orb frezer.
You know, I'm gonna use this big orb frezer, and I really like it, and it worked for me, and I've been looking for something good for a long time, and I couldn't find it anywhere.
So I'm gonna use this.
This might even suggest that the stronger one is that if the guest has so much extra skin, then it might be possible for him to use this stronger version.
That's good enough for me, because I've got a skin that thin.
We're gonna work in the same direction as our orb frezer clockwise, and we're gonna pick it up to about 10,000 turns, we don't have to work too high with it, we can even take it a little lower, but about.
This turn, which would be good, is a speed, because it can warm up a little, because it will heat up the skin, because it will scrub our skin on a very large surface and it will have to be kept completely from the other direction.
I'm trying to show you this in the case of a guest.
You're gonna sit here like this, you're gonna have to tilt it to the right, and you're gonna sit here to the left with your chair, you're gonna turn around, and you're gonna reach through your fingernails, and you're gonna start working from down here.
Now, since this is really uncomfortable for me, I'm gonna be working on my own.
This whole area can be scrambled with it.
So you don't just have to take off the loose skin, but you can also fine-tune the area around it.
And when we get to this point, we're gonna make a big decision, so we're gonna keep our freezer parallel to our nails, we're gonna touch the natural nail plate, and we're gonna start by taking this little brat off with tiny moves.
I'm working my way out, and then I turn it upside down, and I take it down with tiny steps, and you see, I'm working from the front, and these little skin are a little harder to take.
Now, I'm gonna take my turn a little bit, and we're gonna take tiny steps to remove these skin.
So this is the part that could be replaced with scissors, that there is so much difference between the use of scissors and this fresers, that it completely refines the skin in such a 2 mm band and gives a very nice effect.
You just have to be careful about this, because maybe if we're not so experienced, then this can be overdone, and then it'll be sensitive to the customer.
And you see, he removed this skin very nicely.
So we're done with this part, and that's gonna be our fifth step.
This is the 5-millimeter Big Sphere.
We keep this fresser clockwise from the left, so from here on the left, we're gonna have our little orb fresser.
That's how we're gonna start, we're gonna go up, and as soon as we get to this arc, we're gonna turn around.
Get down.
That's it, and then we're moving on.
As soon as we get to the center of it, I've got my eye on it, but it can be turned right here, and we're going like this, and we're gonna turn around nicely.
Okay, so that's where we're headed.
From the front, it is very important that we work almost entirely in parallel.
So that means it's not really raised.
You see, the top of the nail is just a small gap between the two, so it's just that we have to fit, so I can't tilt it any more, but let's run it as parallel as possible, as closely as possible with the new bone or the surface of the natural nail.
Okay, and I'm gonna show you what this looks like.
Now, the problem is that you can flatten this skin a little bit, which, of course, we cleaned up here, and I do, because I have skin so thin, so I don't usually see this kind of manicure, but I'll show you what else we have to do.
The next step is that we're gonna do another skin lift with this stairwell, and that's how we're gonna lift this skin even more, so I'm gonna go below and lift it up towards the ceiling.
I'm gonna go under, I'm gonna lift, I'm gonna lift, I'm gonna lift.
Look, I'm gonna put it under, I'm not gonna push it yet, I'm just gonna pop it up like this.
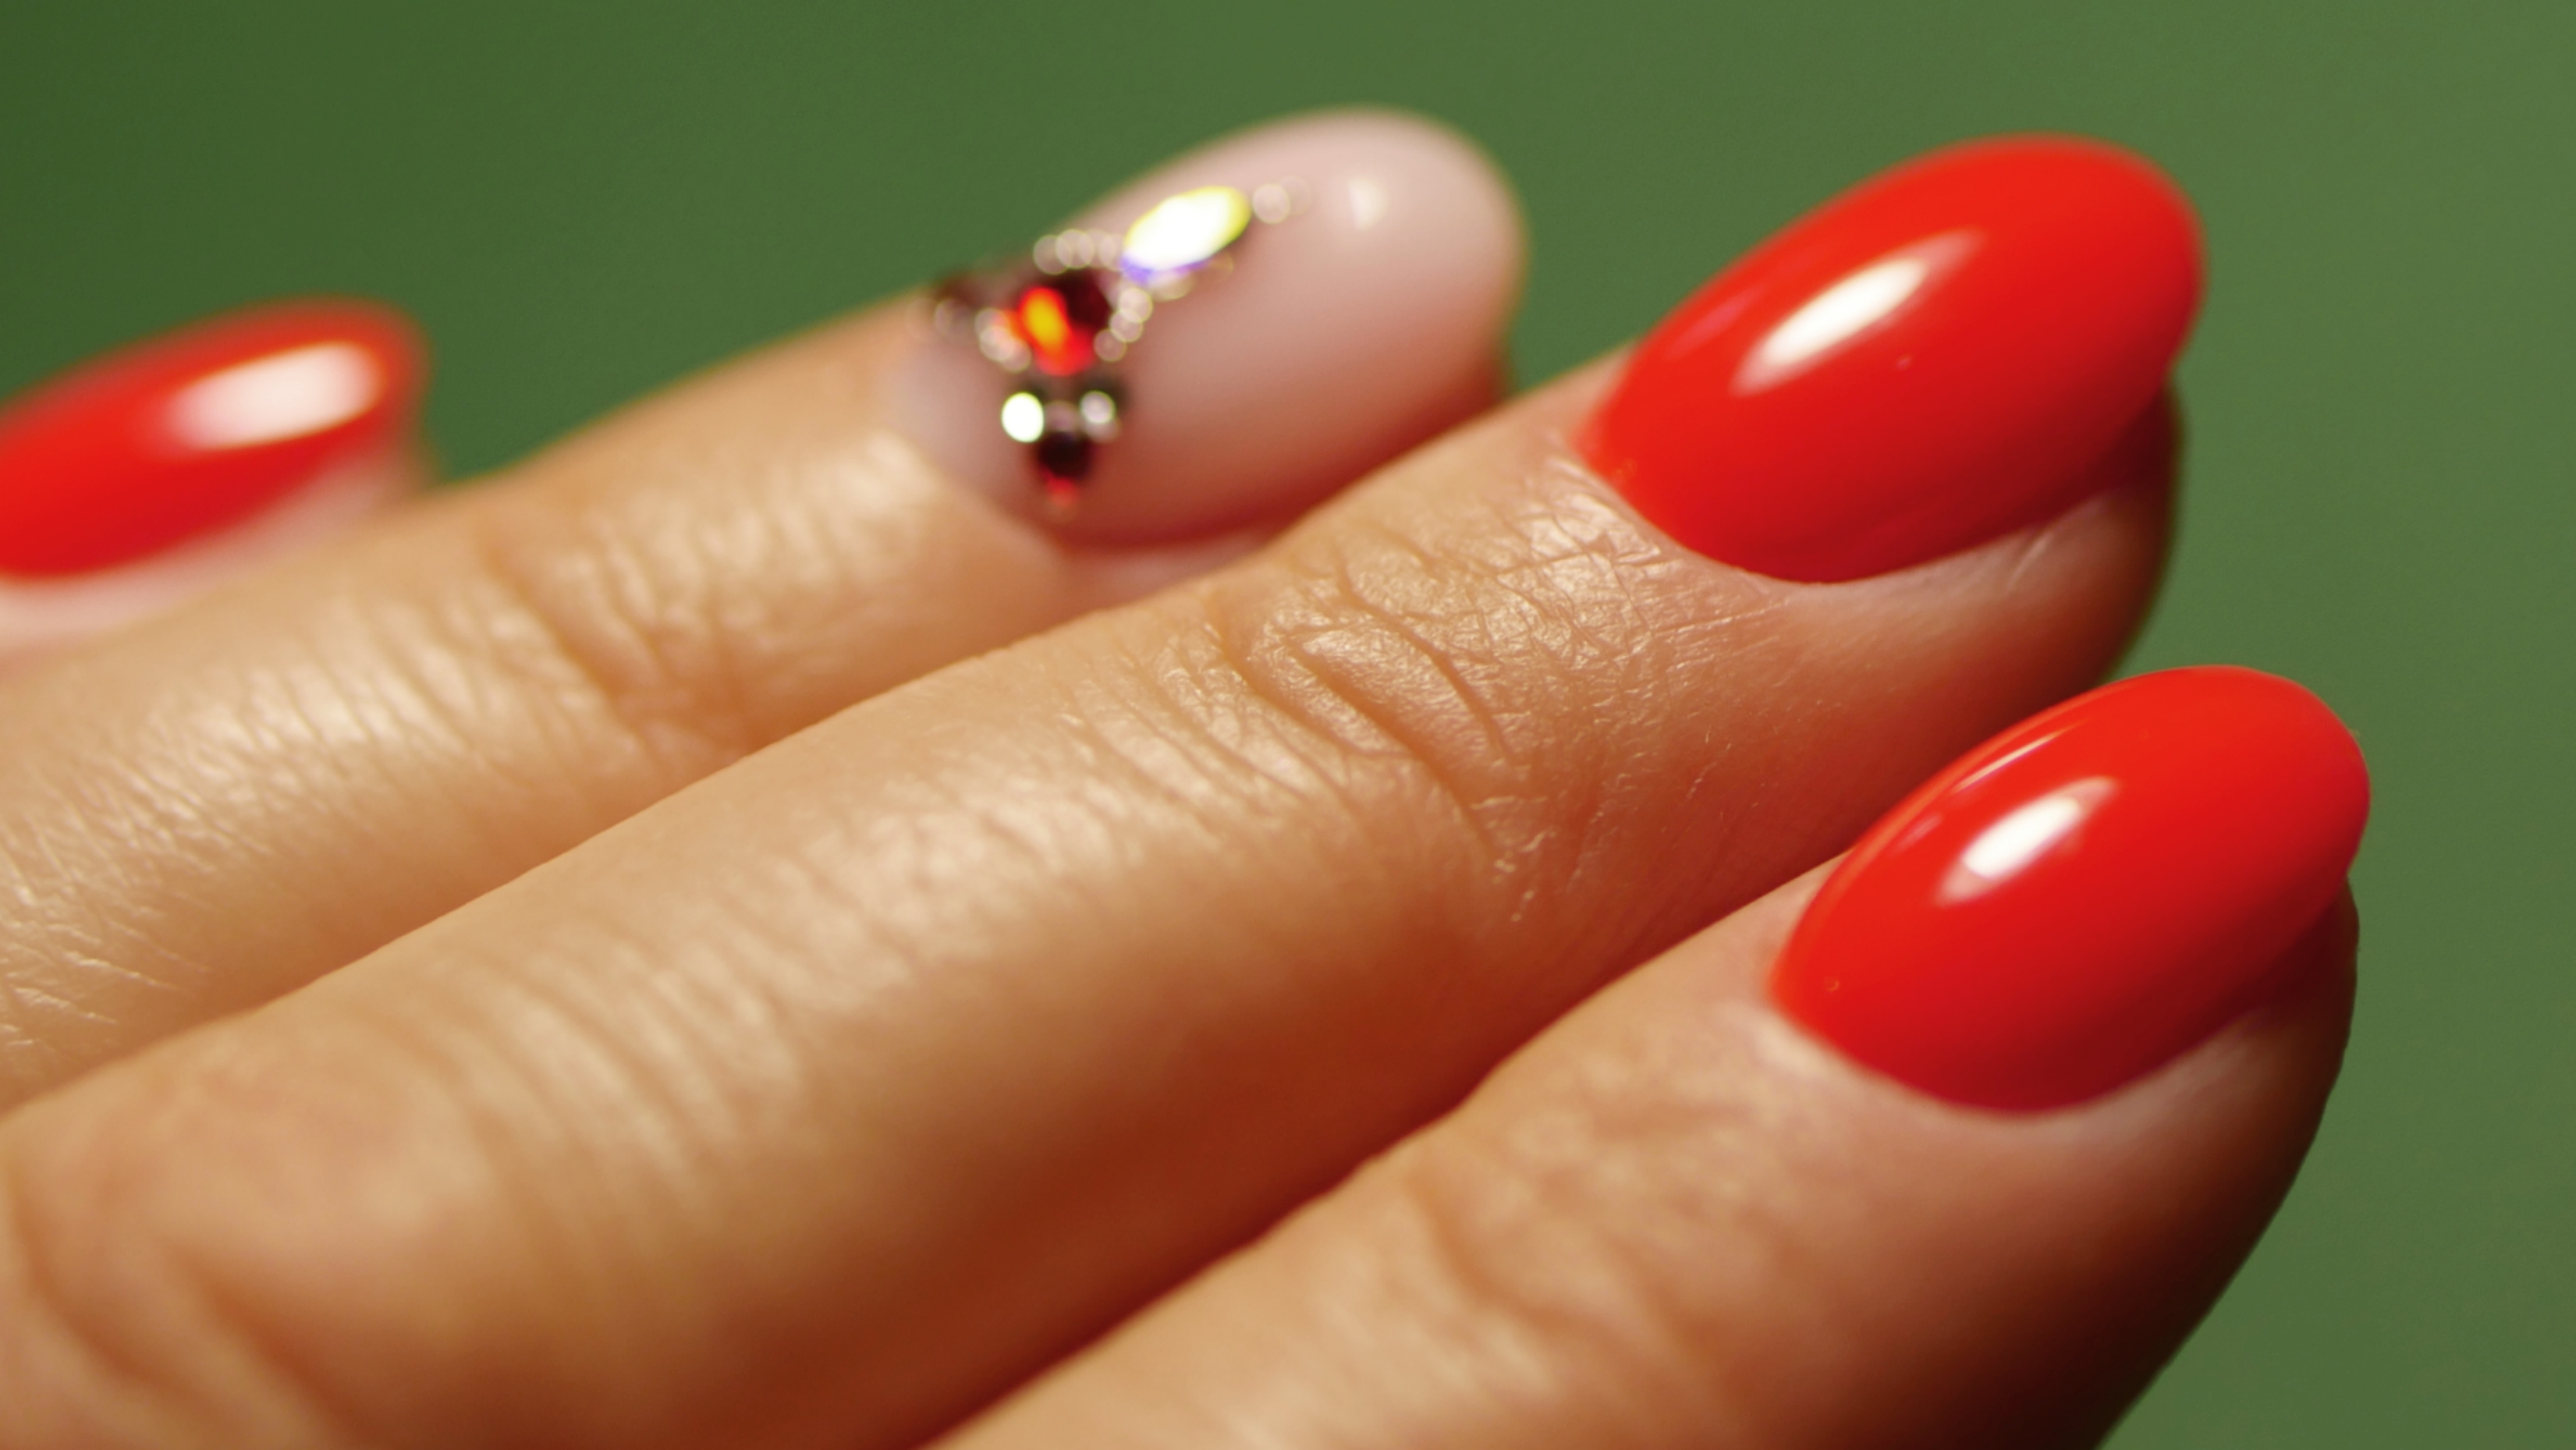
It's a very nice way to highlight it, and then I can tell you it's so pretty there.
You see, it's such a nice hole, you'll be able to work with it nicely.
Okay, and I usually suggest that we send the guest to wash her hands, but not to wash her hands with soap, but to rinse the dust off her hands.
So it's very nice to get these little white pieces out, because it doesn't seem like the place of work is clean, but in the meantime, this dust just sits in everything so hard that it's very hard to work with, and it also drives the material, so if you don't want to set up a guest, you can buy an empty bottle somewhere.
For example, I shut up, Moyra's press-head-cleaning fluid was in one of these bottles, and it ran out for me, and I cleaned it thoroughly and filled it with water.
Well, all you need to know is that it's also necessary to sterilize or replace water at times, so it can't be that it's on the shelf for, say, a month, but it's also possible to do that if you don't want to set up and send the guest, and then you have to use a number-free wipe.
Whether it's a number-free wipe, this is Moyra's number-free wipe, or this little spotless number-free wipe is appropriate, that's better, that's a little bit of fiber, but it's very minimal.
But, for example, cotton can't come up at all, unfortunately, it can get caught in the dry skin around here, and then it's gonna get wet.
Anyone who feels it's necessary can get a little booze on the surface.
Technically, it is not necessary, because the previous gel lake has been polished, so the matte and the grown area have also been matted with the Half Flame frezer, but anyone who feels the need for it may have a bumpy surface or see it as shiny somewhere, will calmly burrow the fingernails.
You have to make sure you don't use such a very rough buffer on your own, don't you? On the one hand, because the skin that we've done nicely will be ruined, because it will be scratching and unfolding everywhere, but such a worn-out, worn-out buffer, it is possible to do absolutely, perhaps even a line detachment, which is still an option, such a foamy file, which is such a softer version, can be done even with this subsequent booze, but it is not necessary at all.
I'm gonna do a dusting with a not-so-fine brush, so, for example, this unicorn brush, so what really feels so good about the way we pull it on our skin, it doesn't come up in this case, because it's very weak and does nothing, it just pushes the dust into the side lines.
It's always worth taking a portrait under my nails, so don't get the material back, and then, if that's all right, let's send the guest away, or, as I told you, I'll spray this little fiber-free wipe in, and we'll wipe these dust particles from the side.
So with the tip and the side, I'm gonna shove it in here, and by the way, I think it's easier to wash your hands, but you can do that, and you can clean it up really nicely.
And, yeah, that's usually the question.
But it's okay that I wipe it with water now, that I might have a grip problem with my nails, there won't be, don't worry about it.
On the one hand, because it doesn't soak in it, so it doesn't absorb the natural conditions with this water, so there won't be any adhesion problems, but you'll have to wait for the drying time, so you'll see that this growing area is just getting white again, so obviously there's a need to wait for the drying time, it's very important, and, of course, the use of different preparation materials, which will take excess water from your own nail plate, so that this will all help us to make our grip suitable.
Show More