Read the transcript of the lecture
Bye! I have a mini tutorial for you now.
I would like to show you a very simple technique, but I think it's more in demand than ever.
At least I think so, or at least my salon experience has been, there are a number of times that my clue on these great okomintas is the guest Compared to the circle.
But even if you're not just looking at it, the patterns are still large for some reason, I don't know the exact reason for that, and it would be great, If we could just get these patterns down.
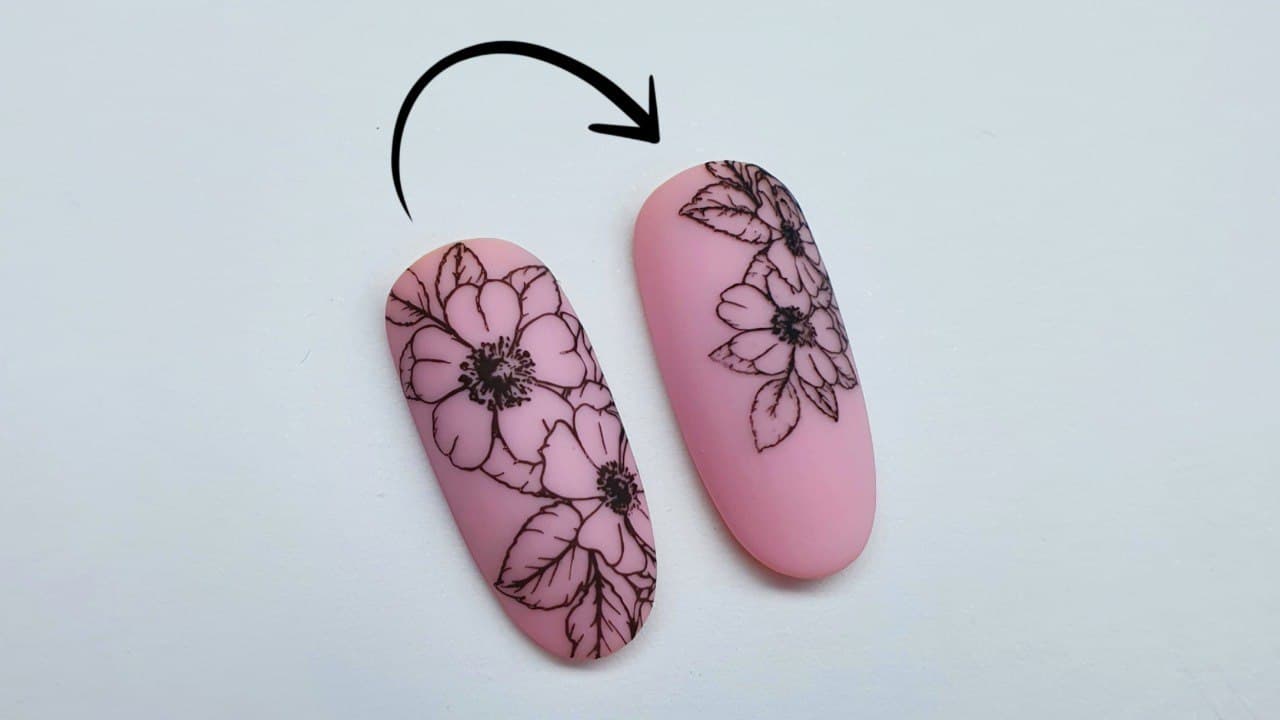
I am now printing up the original size, this is the original size of Moira's Norcas Garden plate, here is the sample, you can see it, This is a pretty narrow and long tip.
Apparently, this is pretty much what we do for our guests.
For length, I can imagine that people might ask for shorter nails, but I'm trying to illustrate how much the pattern can be made smaller.
Actually, the way we miniaturize, apart from this technique for now, will depend on several things.
On the one hand we will need two print heads, there will be one, I have this transparent one, which will be used to pick up the pattern, and there will be a white one, on which we'll print our pattern and from which we'll print the type, so we definitely need two print heads.
How much we can reduce the size of the pattern will depend on how much we can or want to pull this white print head out and To push the sides apart, so that the head of the print actually opens up, and how much it will shrink back when you let go.
Ok, so the bigger this margin is, the more you can reduce the size of the pattern.
There is one more cheat, if you think about it, for very such symmetrical patterns this is not possible, but for say an inda pattern I think it is even Good information.
If the only problem is that you are not afraid of the width of the guest's nail, you don't have to pull the head of the press completely apart, but just pull the two sides apart like this, and when you pour the pattern back in, it will just narrow.
So it's not going to contract symmetrically and shrink all over the place, it's just going to shrink in width.
However, it will also compress the pattern, so I say Example, just to give you an example, if you want to print, say, a face, you can get very shriveled up, so that's always not too lucky, but even with certain flowers that's not a problem, That if it is shrinking, either in a hibiscus for example, or I say really in such spots, or in an indai sample it is absolutely a viable way, And well, it's just as true that if you want to lengthen or shorten the pattern, for example, you will press in the opposite direction.
Okay, we're going to do a completely standard symmetric swapping like this.
So you definitely need this print head.
Both of my print heads are mojras by the way, I'll put them in from the materials list, this one doesn't have anything written on it, so you'd have a hard time finding this one.
The thing about Ikaza is that if it's not mojras, there's no problem.
The main thing is to have such a good, flexible, soft, sidikon head.
It can be transparent, so it doesn't have to be white.
In fact, it's definitely better to have a transparent one.
I have the other transparent one, and I didn't think that I would need a transparent one.
However, you should know that you can't see through it, so it's difficult to position the pattern if you want to put it in the middle, for example, colorimetrically the sample.
The other clue is that you can pick and choose what you like for everyone, or according to everyone's taste.
Isn't the end of this one such a nice little trastoso, which is why I liked this print head.
In general, I really like the silicone heads for you anyway for the soft ones, and for me it was also a consideration to have one of those wider print heads And since it's soft and wide, I knew it would work well from here on out.
If this rhinestone is bothering you, it's precisely because you're putting on a pattern that I mentioned before, that it's symmetrical, and you want to see it, Where the pattern goes, you can take that off of it, and then you can neatly adjust the print head relative to the nail, I'll let you know where the sample goes.
I'm going to take this down now, because it's so annoying so as not to disturb us.
In addition, we need, I will be using a plain printing plate.
The prints I always prepare to highlight are very important in my opinion, so using plain nail polish is basically not recommended, Because I'm not sure there's enough pigment in it to make it look as though even the flattest lines would be fine, If I can see you, so I'll definitely suggest a print, it's a plain black print.
We also need a puller for the plate itself, and I'm going to use a linting roller to clean off the print heads.
If you have gelled the printheads before, you should definitely wipe the printheads with a printhead cleaning fluid, Because the gel has this little film layer that stays on top, and that's why it can't take up the varnish of the printing press, So clear your head with one of those print clean-up flows.
I would definitely recommend using five of mouthwash to clean up the print, as silicone has these fluffy things sticking to it, so I wouldn't recommend using plain cotton wool for example, However, it's safe to clean your lemmas with a cotton swab.
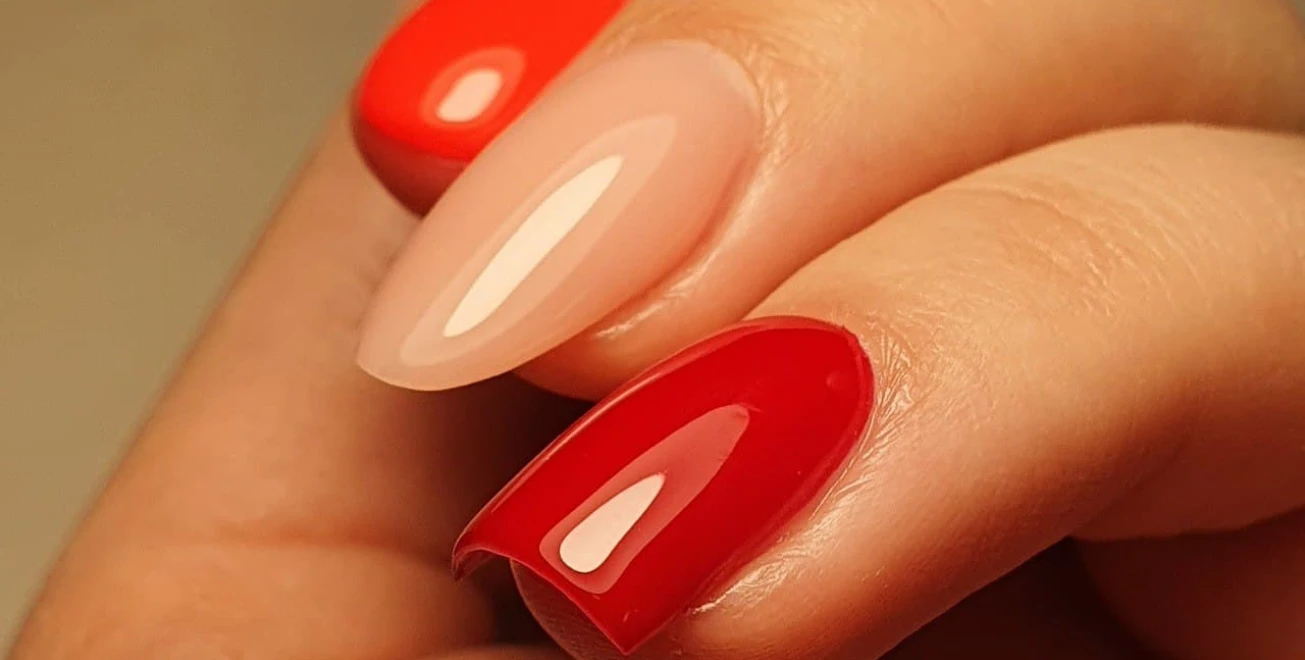
For the tip, I've already applied a base color.
The color, in case you were wondering, is Perfect Nails Slugger Plus color number five.
I've applied two coats of this, tied it off, and stopped at this point, just to give you a little idea of what's next.
You can have two options, you can either gloss the surface with a fixative or a non-glossy gloss, if you use a fixative then of course after spending You need to wipe off the sticky layer, then you can matt it, if you are matting it is very important to use a finer powder refiner.
However, you shouldn't matte the surface with a block brush like this, for example, because it will make the whole nail very cardboardy, and simply can't get a good grip on our printing press.
But, to make it less of a hassle, it's a bit difficult to get the buffer in the side back rails, So I usually recommend to simply apply a matte top coat, I think it makes your job much easier, So I'm going to use Moira's no-fix matte concealer for this.
I'm just showing you this to really get you hooked.
When you're looking for mattes, it's safe to work with a tiny bit more so that you don't have a streaky finish.
Of course, it also depends on what kind of matting material you are using, because to come across one, well, it's not up to scratch, It's a good matte topcoat, so I recommend it to you.
You can safely apply more of this, it won't thicken or yellow your nails, so feel free to apply it thicker.
So, the real point here is that if you spread it very thinly, you will get a streaky main.
and in places it leaves these shiny patches, which if left as it is, would be distinctly cloudy, but because it's an uneven surface also means, so you can imagine that the patterns will not fit well again.
Okay, and then as long as you're knitting this, we'll get things ready, then it'll look a little bit second to printing as normal, if we have to make it smaller.
Here is our little sample.
First of all you have to clean it.
I've pretty much already rolled it off, but it's definitely worth going over again so specifically before we sample it.
I'm going to use a plain cotton wool disc for this, because it actually has a softness that's good to press into our print pattern.
So it's quite eventually you have base you can press this soft cotton wool into it, but it doesn't sizzle as much as you would just tear a piece off a plain cotton wool, So this is a great way to thoroughly clean up your samples.
When you are blowing on the pressure plate cleaner, be sure to move the pressure heads, because if you blow on the pressure plate cleaner, you will be bitten by it.
My printing plate cleaner is also moth.
Whatever brand you use, but really what I want to point out here is that the press-n-brush cleaning fluid itself is an important factor of this technique, or not this technique, but the technique of printing, because even the plates are stuck together after a while with a greasy It gets a filmy coating and you can't clean it off well with a regular nail polish remover, for example.
I tried it a long time ago, it used to be the only one, so we could use it by default, but it wasn't the real thing, so you couldn't print as well as you do now.
Good, the liquid, in case you find that you're getting very dirty, you forgot to wipe the varnish out of it, say, last time, you can feel free to direct spray it on anyway with the press release and liquid, but since I actually only have a token one now I'll wipe it through, Because I've just cleaned it off anyway, so feel free to spray it on the cotton wool, and good, I'm going to press it thoroughly into the cotton wool, into the sample, I'm here to help you clean up even the smallest parts.
Good and I always fold one, and then the very end you can almost hear it in the voice, as many skates that I've been wiping with the clean, so dry part of it actually.
Ok, and when you've wiped through the header like that, you don't start printing sensibly straight away, you have to wait for it to cure a bit off the surface.
It may be that we think we've erased it, but it still has some of that printing plate cleanup header on it.
I apply the varnish in place, it pushes it away from the pattern, so it sticks together for real.
But we can take advantage of the time it takes to dry, because we'll have taken our guesses, and since it's a little bit longer, it's going to be a little bit longer to print this way, so by the time we get to the point of printing the pattern on the nail, the pattern will be dry on the print head.
So, we can't get the sample on the nail, so this is where a trick comes in to apply an acid free primer coat on the surface.
This is not only useful or applicable in this case when doing this kind of this kind of downscaling technique, but also when doing this kind of this kind of downscaling technique, If for some reason you don't get the printing right, if you are working with printing plates, that's usually the problem, If you've already got the pattern up on the printer's head, you're a bit slow.
So the sample is drying on the print head.
In such a case, if you apply an anointing primer coat on your nails, you will get a stickiness and this stickiness will take the print off your head our sample.
I'll put a little bit more in the middle here.
So roughly we should see a uniform brightness on the tip.
So not too much acid free primer, but very little.
So you should have enough stickiness to be able to peel the pattern off the top of the print.
Good.
We'll make the pull-down here then.
Here's our printing form.
You should always shake the print a little before use to get the pigments to come up from the bottom of the varnish.
I don't have a lot of ink, because I've just printed the other pattern, but I've shuffled it a bit to make it more stable.
And then we'll get the other print head ready.
I see that it has some lacquer residue on it, for example, but even if I didn't see it on it, I'd definitely do a little scroll through it to see if I touched it with some weave or whatever, I'll let you know.
We'll get this done here, and then we'll get the other head cleaned up, so the white print head too.
I'm trying a little bit of your site because it was a bit fluffy there.
I've already said we won't use it, but not to put my glove back on the surface.
Good, and then we'll need you to try to find some of those teas.
This is a professional gellac with a handle, which is a bit narrower like this, so you can clamp the print head on top of it.
You can, you don't have to gellactégei, anything you can find, I had a vial here for example, it's good for example, it's so much more comfortable, I can put this down on the table and it's easier to put the printer's head on it, so I've found this for myself here, And if everything is true, I made everything here, yes.
And then I'll show you in the meantime, I'll put this aside so it doesn't get in the way.
We're going to have to put this white print head on this lackeys.
I'll put it in the middle.
I don't promise to be very proficient at this with gloves on.
I take it between my two fingers, so I take the index finger between my thumb finger as well, and I just pull it quite simply onto the lollipop.
But for now, it's just the two sides of this part that are still pretty much sticking out, this one is already pretty well stuck.
So at this time, I'm going to point a little bit more, and then I'm going to bend my index finger over it and pull it like this, okay? So that's how our print head should look.
I'm going to go a bit off track here.
It's a bit difficult anyway with this number point, I need a third hand actually, that's the big thing, and to be in the picture, But I'll be good.
Ok, in principle I could put everything here, and then we'll take up this pattern.
Everything has to be done very quickly, the varnish has to be applied very quickly, the printing pattern has to be applied very quickly, We need to quickly peel off the varnish and press the pattern onto our white print head.
This is a very important step, if you slip a second on a step, you will end up with a total of that many seconds, that the sample will dry.
When you work with lacquer, it's kind of a drawback of the technique, but in return you can make very good contrasting patterns.
If you're printing in zser, you'll be a bit more comfortable, since there's no drying time there, you'll have to count the setting time at the end.
I'll be picking up a lot of the sheet.
The significance of this is really to be able to pull the lacquer off the pattern a bit more loosely.
Don't be in such a hurry, the less varnish you use the faster it will dry.
So here, don't be in any more of a hurry than I am in a hurry right now.
I'm only applying the varnish to the left side of the sample, so I won't be applying it all over, as that would take precious seconds.
I'm going to work fast with the swipe, so I'm going to swipe it from left to right loosely, almost more like smearing the varnish over the surface.
Don't leave a black membranous layer around the pattern, max.
It can stay very tiny because it will be picked up by the printing pattern.
But let's not scrape the varnish out of the sample.
So you have to feel it a little bit, but I didn't want to get into the printing here, but just the printing pattern itself.
So you might want to take a separate printing course if those basics don't work for you.
The pattern will be picked up with our clear print head by rolling it very loosely, right to left on the surface, without any force actually I really just almost press it onto a surface so that it just touches my print head.
Well pretty much that's it, and we'll be rushing to get the pattern on the white print head.
So I'm arriving in camera to stay in it, I can't promise that it will look absolutely fine because I'm having a hard time fitting it in, so it should be absolutely everything in it On camera, but you won't miss it.
Once you've got the white print head on, you've got a very easy job, because you're actually just going to put the print head back on, so that the sample is smaller, and so that we can take the sample off when the hours pass, because we have a sabre-free primer layer You can stick on the necessair print pattern too.
We will be using a lot of varnish.
I need to get the pattern up on the left side, because I loosely cross it out once or twice, scroll it from right to left, quickly scroll it over the white print head, And we can put our printing heads back on the block.
And this is what it will look like now.
If the edge of the other pattern is a little bit stuck on here, don't worry, we can remove these little bits of the clear print head.
And then we will press the pattern onto the surface of the circle with the sorb-free plymer layer.
Well let's take a look at how it's roughly translated from the original.
Roughly here in the top right rows is where I think our pattern will go, and it needs to be tilted a bit.
Pretty much this will mirror and quite just so you can scroll through the interface and voila.
And then I'll show you the original size, which is this size.
So I think that you and Asper are about.
Well I made it at least twice as small, because you can make it even smaller.
Ok, so that's actually the assignment.
Obviously, once your polish has dried, but after that much time, you can decide whether to cover your nails with a polish gel or a mattifying material.
I'll put a mate cover on it.
It's worth painting two thin coats, either of gloss gel or mad, as this will actually protect your trace domain.
It's a bit pattern dependent by the way, the fuller the nail, the bigger the parts of the nail that are covered, the more important it is to apply the two copper coats of nail gel.
For a smaller sample, or if you end up with quite so valanas of a sample, I'd say that perhaps a slightly more generous layer might be enough, But it's more the two layers that I recommend.
Then I hope I could help, if you managed to do it, feel free to send it in.
You might as well make the pattern yourself, how big it is originally and then how big it is afterwards.
If you have any questions, please feel free to contact me, or you can also write to me via the Edubello page.
And then I wish you good learning! Bye!
Show More