Read the transcript of the lecture
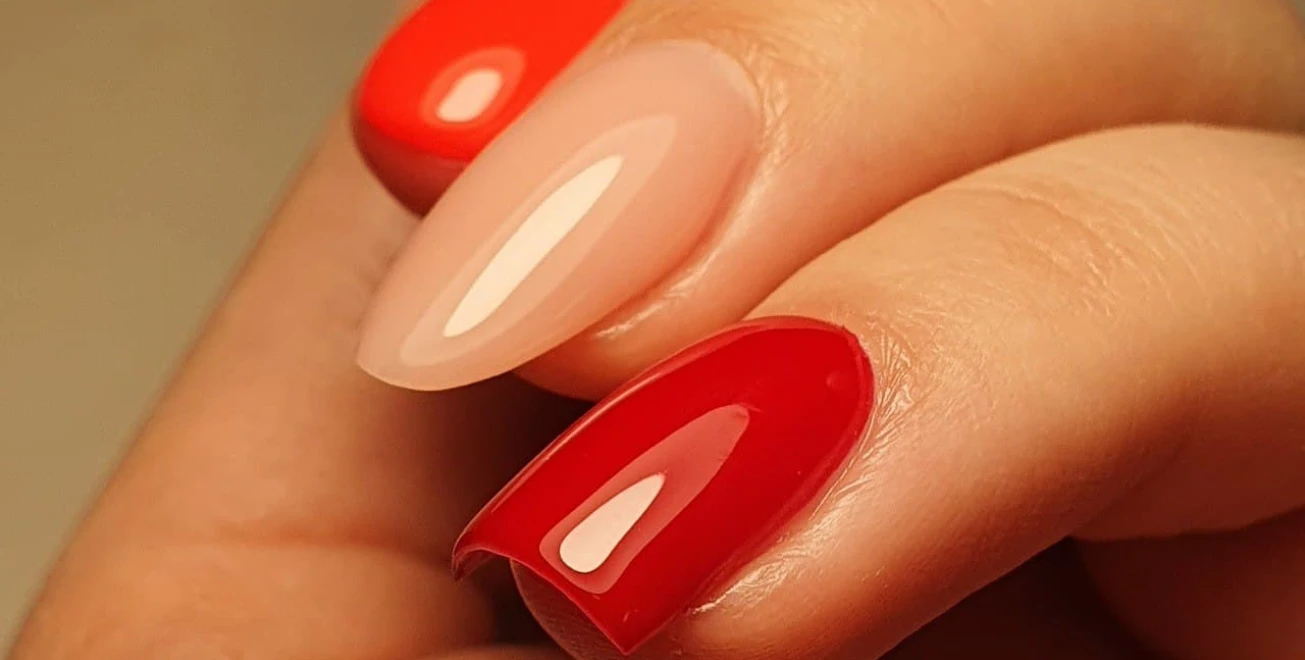
Then come the next one where both ends of the nail will be a different colour.
I also start with a foundation gel.
I'm going to have that done.
I chose a coral level to go with the orange yellow, but for example both colours are really good with neon yellow and I really like that too.
I do the same as I did with the first sample.
I'll put my brush here.
I'll take the enamel.
It's a touch and feel motion.
I can tie it so that when I put the orange yellow on, I don't mess up what I've already done.
But it's also changed my hand, it goes on pretty quickly.
The orange looked good.
Thanks for making it happen! I'm not going to put glitter in this one, I'm just going to put the faux gloss on this one.
I'm going to go over the whole surface of the nail.
Then I'll take a bigger pot.
I put it in the middle of the nail.
And I'll use my zero brush to blend it outwards everywhere if it's thinning.
If I get the feeling I'll flip it over if it moves too much in either direction.
It's moving, it's already hot because there's a lot of material, it's easier to do in a smaller circle.
I'm not necessarily saying that you should practice the first one on a tip, because you really have to put so much stuff on, and it'll run off in no time, especially in this heat.
So you see, if I like to wear shorter nails, I might try it on my own hands first, But it's a smaller surface.
Ok, it's pretty much done, I'm going to set it, but I'm going to put another coat on this one because I want it to be whiter, But I can't apply that much stuff at once.
With polygel it would be much, much easier.
Okay, I'll knit for ten seconds, put on another coat and then another big batch.
And I'll just use the zero brush to get it nice and even.
There is a bubble.
If you take it out of the jar with a gel brush, you don't put the bubbles in.
Mix it in a crucible.
Since these parts are almost completely left out here, I suggest you go over with clear.
You know, for a reinforced nail with a clear bisque, and for a gel nail with a clear self-leveling building gel.
It should still have some hold, not just empty gel coat, because actually there is only the flexible, soft gel coat.
So it's not going to give the round any hold.
Okay, that's it.
It'll keep it on the sides.
In case I see a lack of material here and there, I'll apply a larger amount in the same way as I did for the glitters before, You can replace it in the same way.
Okay, I'm going to tie this up.
Enjoy! It sets.
This is what I have, it will set on the matte.
Then you can decide whether you want to leave it glossy or gloss it over if you want it glossy.
So you don't want a matte like this, you want to put a gloss on top of it.
I don't recommend that you spill it completely.
I usually ask the customer to put it back on immediately after about 5 seconds, because it's just about to get wet, But it's not set yet, and then I'm going to put the gloss on, because if you put it on completely, I'm going to put it on, I've decided to leave it like that, so if you put the matte on completely and then put the gloss on, then yeah, As the guest uses their hand, the light will bounce off it, it will stay under the matte.
It's going to be really amazing, especially if you get it dirty.
So 5 seconds between the matte and then the gloss.
Show More